How to install Calacatta Quartz Slabs?
Sep 19, 2025
Leave a message
How to install Calacatta Quartz Slabs?
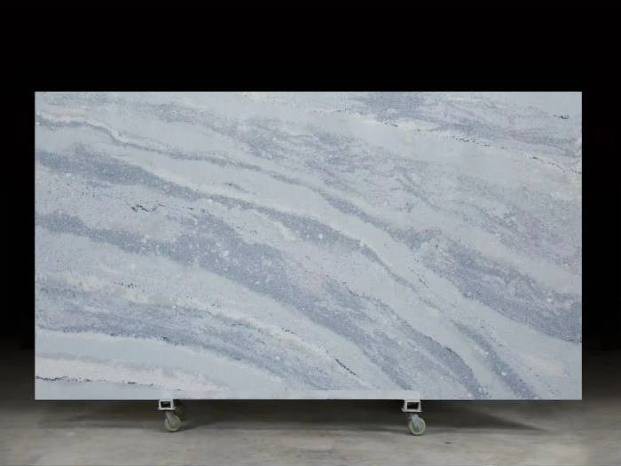
As a supplier of Calacatta Quartz Slabs, I've had the privilege of witnessing the transformative power these slabs bring to various spaces. Calacatta Quartz Slabs are renowned for their elegant veining, resembling the luxurious Calacatta marble, and their durability, making them a popular choice for countertops, backsplashes, and more. In this blog, I'll guide you through the process of installing Calacatta Quartz Slabs, ensuring a successful and beautiful outcome for your project.
Pre - installation Preparation
Before you start the installation process, thorough preparation is crucial. First, measure the area where the Calacatta Quartz Slabs will be installed with precision. Use a high - quality measuring tape and take multiple measurements to ensure accuracy. Any errors in measurement can lead to ill - fitting slabs, which can be a major setback.
Next, prepare the surface. The surface should be clean, flat, and structurally sound. If it's a countertop, remove any old countertops or debris. For a backsplash, make sure the wall is free of bumps, cracks, or unevenness. You may need to use a leveling compound to correct any minor irregularities.
Inspect the Calacatta Quartz Slabs carefully upon delivery. Check for any cracks, chips, or other damages. If you find any issues, contact us immediately. We, as your supplier, are committed to providing you with high - quality products, and we'll work with you to resolve any problems.
Tools and Materials
Gather all the necessary tools and materials before you begin the installation. You'll need a diamond blade saw for cutting the slabs, a drill with appropriate bits for making holes (if required), a level to ensure the slabs are installed evenly, a notched trowel for applying adhesive, a rubber mallet for tapping the slabs into place, and a caulking gun for sealing.
For materials, you'll need an appropriate adhesive for quartz slabs. Make sure to choose an adhesive that is specifically designed for quartz to ensure a strong and long - lasting bond. You'll also need caulk for sealing the edges and joints to prevent water and debris from getting in.
Cutting the Calacatta Quartz Slabs
Cutting Calacatta Quartz Slabs requires skill and the right tools. If you're not experienced in cutting quartz, it's advisable to hire a professional. However, if you decide to do it yourself, here are the steps.
Mark the cutting line on the slab using a straightedge and a marker. Make sure the line is accurate and clearly visible. Set up the diamond blade saw and adjust the blade to the correct depth. When cutting, go slowly and steadily to avoid chipping or cracking the slab. Use a wet saw to keep the blade cool and reduce dust.

Installation Process
- Applying Adhesive: Use a notched trowel to apply the adhesive to the prepared surface. Spread the adhesive evenly, following the manufacturer's instructions. The notches on the trowel will help create a consistent layer of adhesive.
- Placing the Slab: Carefully lift the cut Calacatta Quartz Slab and place it on the adhesive. Start from one end and work your way across. Use a level to ensure the slab is perfectly horizontal. If it's a backsplash, make sure it's plumb.
- Tapping into Place: Use a rubber mallet to gently tap the slab into place. This will help the slab bond well with the adhesive and ensure it's firmly in position. Check the level again to make sure the slab hasn't shifted.
- Joining Multiple Slabs: If you're installing multiple slabs, make sure the joints are tight. Use a straightedge to align the edges of the slabs. Apply a small amount of adhesive to the edges of the slabs to create a strong bond.
- Making Holes: If you need to make holes for sinks, faucets, or other fixtures, use a drill with a diamond - tipped bit. Mark the location of the holes accurately and drill slowly to avoid cracking the slab.
Sealing and Finishing
Once the slabs are installed, it's time to seal the edges and joints. Use a high - quality caulk that is compatible with quartz. Apply the caulk evenly along the edges and joints using a caulking gun. Smooth the caulk with a caulk smoothing tool or your finger for a neat finish.
After the caulk has dried, clean the surface of the Calacatta Quartz Slabs with a mild detergent and a soft cloth. This will remove any adhesive residue or caulk smudges, leaving your slabs looking clean and beautiful.
Maintenance Tips
To keep your Calacatta Quartz Slabs looking their best, follow these maintenance tips. Avoid using abrasive cleaners or scrubbers, as they can scratch the surface. Instead, use a mild, non - abrasive cleaner and a soft cloth. Wipe up spills immediately to prevent staining.
Periodically check the seals and joints for any signs of wear or damage. If you notice any issues, re - caulk as needed.
Different Applications of Calacatta Quartz Slabs
Calacatta Quartz Slabs are incredibly versatile. They can be used in kitchens as countertops, adding a touch of elegance to your cooking space. The durability of quartz makes it resistant to heat, scratches, and stains, making it perfect for a busy kitchen.
In bathrooms, Calacatta Quartz Slabs can be used for vanities and backsplashes. The luxurious veining creates a spa - like atmosphere. You can also use them in living rooms, as fireplace surrounds or as decorative wall panels.
If you're interested in exploring more options, you can check out our Calacatta Davinci slabs, which offer a unique and sophisticated look. We also have Black Quartz Slabs and Blue Quartz Slabs for those who want a more contemporary or bold look.
Contact Us for Purchase and Consultation
Installing Calacatta Quartz Slabs can be a rewarding project, but it requires careful planning and execution. As your trusted supplier, we're here to support you every step of the way. Whether you have questions about installation, need more information about our products, or are ready to place an order, don't hesitate to contact us. We're committed to providing you with the best products and services to ensure your project is a success.
References
- ABC Quartz Installation Guide
- Quartz Industry Best Practices Handbook